
This little thingy here is super special. It helps you make fabric flowers. I did NOT use this to make these. Before I blew all my money on random craft supplies I had to make due. You can pick these things up at craft stores, although I find they take longer to make flowers and I've been told they look "less organic" whatever that means.

Here is what you will need. Again, you DO NOT need the thing (can't remember freaking name) posted in the above picture. You can use if you'd like, but it's not needed for this.

Turn the swatch so the inside is right side up. In other words, the part that doesn't look as cool and that you don't want to be seen will be facing up.
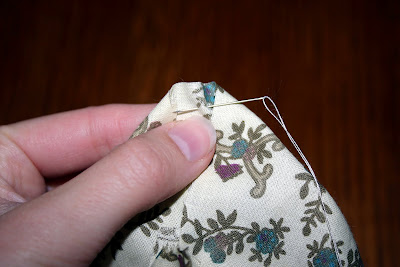
Thread the needle through one corner, and continue with the adjacent corner until you've gone around the whole square.
 Pull the thread tight, it will look like this:
 Then thread the needle again through a corner. Any corner will do, just pick one.
 Thread it through the remaining corners like you did the first time.
 Pull it together. It will sort of like this:
 Grab the folds in the corners and pull them out so your flower can bloom.

 Pull the thread tight, it will look like this:
 Then thread the needle again through a corner. Any corner will do, just pick one.
  Thread it through the remaining corners like you did the first time.
 Pull it together. It will sort of like this:
 Grab the folds in the corners and pull them out so your flower can bloom.
Look! Here is me pulling the folds out. This picture was really hard to take by myself. Just saying.
Repeat with every corner. Then pull the thread through the center and tie off in the back.
If you want to add a clip on the back for your hair I would suggest sewing the clip on to a piece of fabric and then hot gluing it to the back of your flower.
 Then sew on your button of choice. Options from here: Add a clip for your hair, a safety pin for a sweater, sew it on a headbands. or sew/glue it on a ribbon and string it around your neck for a cute and fast necklace. Wear, share, and be awesome.
 Then sew on your button of choice. Options from here: Add a clip for your hair, a safety pin for a sweater, sew it on a headbands. or sew/glue it on a ribbon and string it around your neck for a cute and fast necklace. Wear, share, and be awesome.


